01. LOGIN
Open the Life Tributes software by double clicking the Life Tributes icon on your desktop. Note: If you have not yet installed the Life Tributes software, please reference "1, 2, 3 Easy Steps to Install Your Life Tributes Software Guide." (available here).
After you have double clicked the Life Tributes icon, you will be prompted to log in. If you are not an existing user, this is where you can create a new account.
02. SELECT TYPE
Once you have successfully logged in, the Manage Your Life Tribute window will appear.
To begin creating a new memorial video; click the Memorial1 button found under the Create New Life Tribute section of the screen, as shown in the illustration below.
03. INFORMATION
Fill in the appropriate information in the General Information1and Life Story of Person2 (obituary) sections, as shown in the illustration below.
Click the Choose button3 on the Cover Photo line within the General Information section to select a Cover Photo for the DVD Menu & DVD Box.
The Choose DVD Menu & DVD Box Cover Photograph window will appear, as shown in the following illustration. Click Browse Image1to select an image from a folder on your computer or Scan Image2to scan an image in.
Once you have selected an image, either by browsing for it or scanning it, click OK to continue. The Photo Editor window is displayed, as shown in the illustration below. Once you have selected your Cover Image you can crop and make basic fixes to the image in the Photo Editor, as shown in the following illustration.
Please crop your image by following the onscreen instructions. When you are finished editing your image, click Apply under the Preview heading to save all changes.
You will see your edited image in the Choose DVD Menu & DVD Box Cover Photograph window. Click Ok if satisfied; if you are not satisfied, click Browse Image to select a new Cover Photo.
The General Info window will reappear, as shown in the illustration below. Select Tribute Video DVD1under Project Options and click Next Step.
Note: You will be asked to confirm that all information entered is correct; to confirm, click Yes.
04. THEMES
On the Please select your Themes screen, illustrated below, click Video Intro & Editing1, Video Backgrounds2, Background Music3, DVD Label & Menu4and Credits5 to make your selections for each category. When you are finished, click Next Step.
05. PICTURES
On the Movie Timeline screen, illustrated below, click Insert Image1 to use an image from an existing file or Scan Image2 to scan the image in. Repeat this step to insert additional photos. Ideally, you’ll want to include 25-35 photos in your memorial tribute video, however there is no minimum or maximum limit.
The Image Options section of this window will allow you to add motion, edit, and add text captions to images. Add motion to images by either:
Clicking Add Motion3 and following the motion effects instructions located at the bottom right of the Motion Effects window that will appear. Click Close when satisfied with image’s motion effects.
To apply standard motion to all images, right click on any photo and select Add smart motion to all images.
To make basic fixes to an image, select the image that you want to edit and click Edit Image4; the Photo Editor window will appear and will automatically walk you through your editing preferences.
To create a text caption, select the image and type your content in the Image Text Caption field.
When you are finished, click Next Step to create your Memorial Life Tribute Video.
06. GENERATION
Your Memorial Life Tribute Video will begin to generate. Depending on the performance of your computer, this may take several minutes, so please be patient.
Upon completion, you will be able to preview your Life Tribute Memorial Video by clicking Play1, as shown in the illustration below. When you are finished viewing your video, or if you prefer not to watch the preview, click Next Step2.
07. BURN/UPLOAD/PRINT
Insert a blank DVD into your computer’s DVD burning drive. Click the Burn1 button on the Burn DVD – Upload to Web screen, illustrated below, to burn the tribute video to a DVD.
You will be prompted to protect your video from being copied without authorization. Select Yes2 for copy protection on your personalized Life Tributes Memorial Video DVD
Life Tributes will now prepare to burn your DVD. This may take a few minutes depending on the speed of your DVD burner and the length and complexity of your Memorial Tribute Video.
To upload your personalized Life Tributes Video to the web, click Upload1.
The Upload Memorial Tribute Video screen will appear, as shown in the following illustration. Select how long you would like your video to be available online1 and click Continue2. Confirm your selection by clicking Yes.
Please be patient as your video converts for the web. You will be prompted when your video has finished uploading and is available for viewing online with a new window containing your access URL. Once you have successfully uploaded your video, an email will be sent to you with the web address of your video for further viewing instructions. Click the OK1 button to continue.
To print the Disc Label, DVD Box, and Insert, make your selection at the right side of the Burn DVD – Upload to Web menu window1.
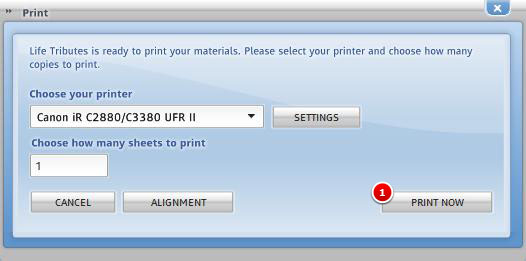
When you click on your selection (example, Print Disc Label), a new window will appear and prompt you to select the appropriate printer, and indicate how many sheets to print. When completed, click Print Now1.
08. DELIVERY
Just place everything in a DVD case and deliver it to your client family. It’s that simple!